
How To Plant Spring Bulbs Like A Flower Farmer
- Nov 18, 2020
- 5 min read
Updated: Jan 13, 2022

Once upon a time we dreamt of moving to the country to start a flower farm.
We did. Sort of. We started. We stopped. We started again. Along the way, we learned a lot about small-scale, intensive flower growing techniques and about ourselves.
Now, after some of life's not so unexpected twists and turns, here we are back in the city. But, I'm not letting the dream slip away. Enter our backyard flower farm and grand plans for spring bulbs galore.
Daffodils, tulips, crocuses, alliums. Just to name a few of the types of bulbs planted in the fall before the ground freezes. They sleep, cozy in the underground until the spring's sun and warmth awaken them into a riot of forgotten colour.
Hang tight as I share with you some of the knowledge we've acquired about planting bulbs like a pro with hopes that you can be inspired to create your own garden delights - however big or small your space, or your flower fantasies.

THE BULBS WERE POPPING
A few years ago I was in Skagit Valley about an hour north of Seattle in an area known for its floriculture and annual tulip festival.
Everywhere we turned bulbs were busting out all over.


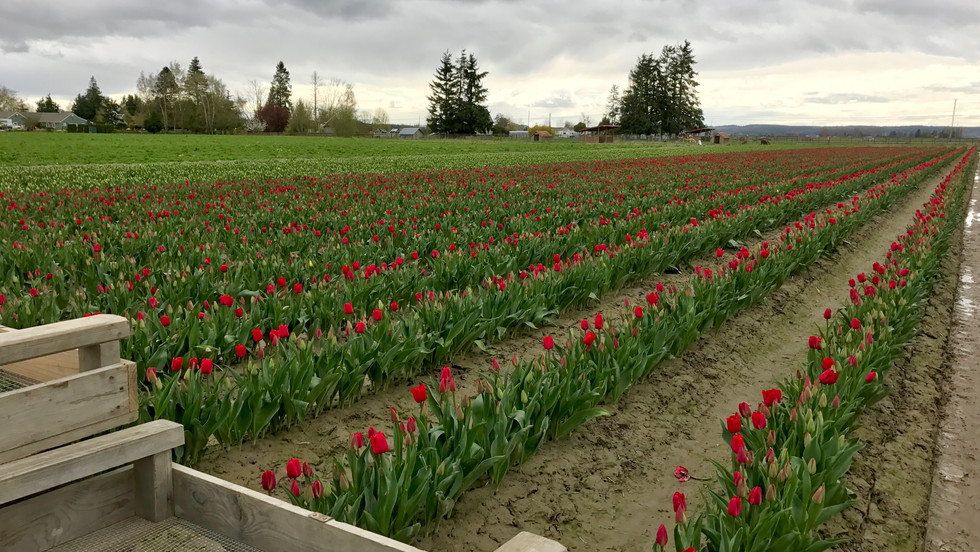


Rows upon rows of daffodils and tulips. Flower farmers treat these spring blooms as annuals and pluck them - bulbs, roots and all - out of the ground and pile them in wooden pallets. Some flowers are left in situ to complete the growing cycle so the bulbs can regenerate and be used to grow again.
THE HARVARD OF FOWERS
The real reason I was in tulip country though was to attend one of the last in-person workshops at Erin and Chris Benzakein's iconic Washington flower farm Floret. Erin's popularity as a purveyor of beautiful blooms and as a teacher of the techniques on how to grow them has resulted in rapture amongst her fans. I was no different as I became student and disciple.
Smitten, I drank in every delicious drop.
Here's what I learned about spring bulbs:
It all starts with the best bulbs - good size, good health and good sources
Flower farmers treat spring bulbs as annuals - taking the bulb, root and all, out of the ground just as the blooms begin to ripen
The flowers can store longer in this state
As well, since the crop is being harvested for the blooms, they would be cut before the bulb is able to nourish and thus the bulb is weakened and its reliability to reproduce flourishing blooms the following season is diminished
Flower farmers need to maximize growing space and make harvesting easier, so when planted, the bulbs are placed way closer together than most package directions recommend
While, I think they look beautiful no matter how they bloom, professional growers plant practically in bulk and in rows in a manner that makes sense for their business
Flower farmers try to extend the growing season by forcing bulbs during winter months and cajoling blooms in very early spring by planting bulbs under the cover of hoop houses
Consumers of blooms are becoming more informed and are seeking alternative, specialty varieties and those which are sustainably and locally grown

More than flowers - read all about my experience at Floret here.


Here I am with a bouquet of stunning Tulips Sensual Touch grown at Floret. On the right, tucked in like a full chocolate box, tulips get a jump on the growing season in one of the many hoop houses that dot the property.
PHOTO (left) | Chris Benzakein
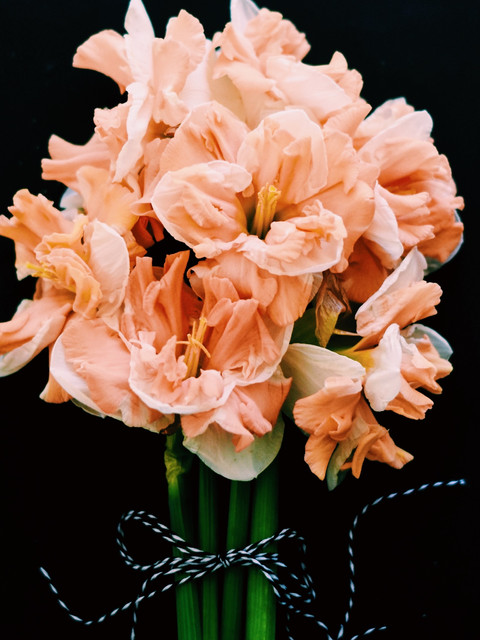
Beautiful spring blooms at the Floret workshop.
A HYBRID PLANTING APPROACH
Since we now have a backyard garden instead of rows of field to sow, I'm taking an approach to spring bulb planting that combines the vigour of the farmer's intent with the design aspirations of a home gardener. We want blooms to fill our vases as well as a pretty landscape to look at.

Pick your bulbs with an artist's eye. We planted more than 700 bulbs which isn't much for a flower farmer but is getting up there for a backyard gardener. When choosing the bulbs, think about the look and feel you want, like you're painting a picture. Do you want a riot of colour or something more harmonious? Do you want speciality varieties or are you dipping your toe in with pre-made packs from the garden centre? Since we want to max out the potential of our four raised beds, we plant very intensively and with speciality types. If we can't do volume, we will ensure that everything we grow is sublime.

Begin with a plan. I know it's tedious.
Take a quick sketch of your garden detailing its main features and the perennials, annuals and shrubs you have or intend to have.
Create a picture guide of your spring bulbs showing what they look like in bloom and record the amount of each type. Give each variety a distinct number. I order my bulbs months before they arrive and sometimes have a hard time keeping track of what each variety looks like, so this really helps.
Now, take that garden sketch and think about where you want to plant your bulbs relative to the other elements in your garden. Think about variety, colours, bloom time and sunlight. Then, overlay the numbers of the bulb types on your sketch with the number of bulbs you will plant.
If this is all too much, then just pop the bulbs in the ground wherever you like, there's no wrong way to do this. The important thing is to grow something and take joy doing it.


Plant with enthusiasm. Read the instructions that come with your bulbs. Generally speaking, they should be planted to a depth about three times its size, in a sunny spot. The tips of the bulbs should face up, roots at the bottom. Most of our bulbs are underplanted with other garden plants. This means we carefully squeeze them in to whatever space is left (in our crammed raised beds, this is tricky but the result is a wild and lush).

How to plant bulbs like a pro.
Carefully dig out the soil into a bucket and build the correct-depth crater.
Work in some bone meal to feed the bulbs.
Arrange your bulbs closely but not touching.
Gently return and pack down the soil to remove air pockets.
Water to stimulate root growth and settle the soil.
Cover with leaves if you have.
Place a labeled stake so you know where you've been.


Yes, you can plant bulbs in containers. A few seasons ago, we were so late getting around to planting our bulbs in the ground that we ran out of time and put masses of them in outside urns. We had an incredible crop.

Squirrel proofing. Well, at least you can try. Red pepper flakes, moth balls, blood meal, chicken wire, a barking dog. I've found the best way to keep the squirrels in check (albeit, we never really win the war) is to plant mostly narcissus bulbs as they don't really like them and to plant as late in the fall as possible when the squirrels are a little less interested as they've stored up their reserves and are hiding from the cold.
AFTER ALL, THIS IS WHY WE DO IT
Despite the back-aching digging in temperatures that makes your fingers freeze and the enduring battle with those who want to make your bulbs their dinner, all is forgotten in spring.
Glorious spring. With blooms everywhere.


Comments