
Stylish Value Lights, Spraying The Rafters, Managing Reno Mess | ORC, FALL 2020, WEEK 4
- Nov 1, 2020
- 4 min read
Updated: Jan 13, 2022

Man, that drywall dust gets everywhere.
Living in situ during a renovation requires fortitude and a plethora of cleaning supplies. Especially for a tidy enthusiast like me who can't leave the house if there are dirty dishes in the sink. Here we are at Week 4 of our #OneRoomChallenge bath and laundry room redo and while we are brushing up with vigour and frequency, the end is in sight. And that extra headroom we gained by exposing the rafters is one of the best decisions yet and the industrial cheap-chic lights we found to go along with it are just perfect.

In its eighteenth season, the One Room Challenge™, takes place in April and October. Each round, twenty design influencers take the challenge as Featured Designers. Every Wednesday, the designers document their process over six weekly posts. Better Homes and Gardens is the official media sponsor.
In addition to following along, everyone with a blog or Instagram account, is welcome to join the fun as a Guest Participant by linking their own room transformations up each Thursday, flooding the internet and social media with interior design inspiration, ideas, and encouragement.
This is our second One Room Challenge as a Guest Participant, but it's the first inside project we are tackling in our new home. See our first ORC - the makeover of our flower studio and garden. We are #LovingLeuty.
Tips For Living Through Reno Mess
Even though our refresh is taking place at the basement level, that dust makes it all the way up to our third floor. Before I share the progress being made down under, here's a PSA detailing some of the things we're doing to manage through the inevitable and necessary upheaval:
Box up home accessories in the living area (books, decor items, pillows, throws, pictures) so you don't have to keep dusting or washing them
Cover living room furniture in the morning with old sheets or blankets and remove at the end of the day so you have somewhere to sit
Use shower curtains or sheets to hang over doorways to help keep the dust from moving about
Shut all the doors to bedrooms, bathrooms, closets, etc. to reduce opportunities for the dust to settle in
Limit using the furnace so the dusty air doesn't get recirculated through the house
Divide and conquer - at the end of each work day we clean up the non-reno areas of the house, Graham will vacuum, I will mop and wipe down all the surfaces
Keep a pair of "basement" shoes by the stairs to wear in the renovation area only
Get rid of debris through a lower level window so you don't need to bring it through the house
Don't leave any food on the kitchen counter; put fruit in the fridge or cover with a cloth if it has to stay out
Plan ahead and keep meals simple so that as you spend all that extra time cleaning, you won't go hungry or default to take-out every night
Keep a sense of humour and remember this too shall pass
It's All Worth It
The room is being put back together. The plumbing and electrical is roughed in. The drywall is up. The concrete floor polishing is happening in a few days. So more mega dust. But, we are getting there.


Week 3 Week 4
You can't see the shower stall any more because the new wall holding the pocket door has been installed. We made the doorway 36 inches wide to accommodate appliances and to allow as much light as possible from the window to spill out into the hallway and rest of the basement.

Here's the area for the toilet and storage closet on the left and the shower stall on the right. The original plan had the shower head on the back wall, but that is an external wall, so for protection from the cold, we've moved the shower components to the left side.


Week 3 Week 4
Drywall and primer. So much better. All ready for the washer and dryer and sink to be installed once the concrete floors are polished.

What's this picture doing here? Well, if you look at the Week 4 image above, just beside the window, you'll see a pipe going outside. Remember the scary dryer fluff story from Week 2? Proper venting of our dyer to the outside meant that our dear crew had to bore through ten inches of concrete to run the piping. Of course we found a use for the 100-plus-year-old leftovers.
Raising The Roof To Create A Loft-Like Lower Level
In a basement, every extra inch of ceiling height makes a big difference. By removing the old drywall on the ceiling, we gained about six inches of actual headroom and even more optically. Keep these things in mind when deciding if exposing the underbelly is for you:
You need a good sprayer and a lot of white paint - those old rafters suck it up and you'll need three coats
Tidy electrical, heating, gas and plumbing lines is a must
You need to be OK with imperfections

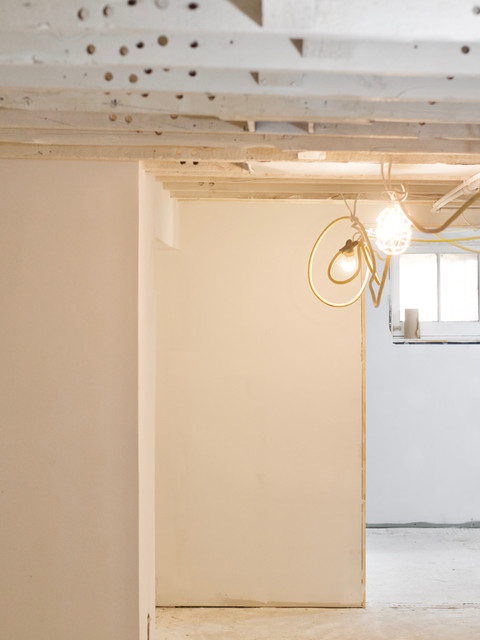
A bit more paint needed, but you can start to see things shaping up. The white wires you see are waiting for the lights.
Best Value Lighting
Since we are exposing the rafters in the entire basement (not just in the bath and laundry room combo), we need in total about 18 (yes 18!) lights. So finding stylish and economical lumens is critical. After much scouring, we landed on these awesome cage lights on Amazon for about $40 each. Bonus.
The all-metal shop lights which come in a number of finishes from Woods are water-proof and come with their own internal electrical box. Matt our electrician says to make sure we get lightbulbs suitable for an enclosed fixture so they don't overheat.
Up Next
I can't wait to see how the polished concrete floors turn out. I'll be excited to share the results with you next week.
Need More Inspiration?
If you missed it, you can catch up on our progress:


It is an exercise in geometric rhythm, where the ball traces lines of calculated impact. The satisfying collapse of forms is the quiet reward of block breaker game